Item Screens
Item Screens help you organize your Items to make finding them while taking an Order as simple and intuitive as possible. Instead of organizing Items solely based on the hierarchy of Category, Subcategory, or Group, you can organize Items based on any criteria you wish including prices, or the hours they are available. For example, you may want to have a Breakfast Item Screen that includes Items that are only available from open to 11:30 am, when you stop serving breakfast. Or, maybe you may want to offer a Dollar Menu, so you would organize all Items you want on the Dollar Menu into a Dollar Menu Item Screen and set the price for the Item Screen at $1.00.
You create these Item Screens in the Merchant Portal to make taking Orders much simpler on your Vital Select app. Item Screens will appear on the Orders Screen in a column on the left hand side of the screen. Tapping a Item Screen will populate the center of the screen with buttons for each Item organized under that Item Screen. From there, you simply tap a Item Button to add a Item to the current Order.
Note:
While the Item Library Hierarchy will still be in place in the Merchant Portal, you won’t access your Items in the app based on these assignments. Rather, the Item Library’s main functionality is for accounting and inventory organization.
Item Screen Attributes
There are two ways to create Item Screens: individually using the Add Item Screen on the Item Screens page, or by clicking the Create Item Screens option, listed on the dropdown menu, located on the top right side of the Item Library Screen. If you choose to create Item Screens directly from your Library, Item Screens will be created for each Category, Subcategory, and Group that has Items organized in it. These Item Screens will have the Name, Icon/Color, and Items that you assigned to the original Category, Subcategory, or Group.
If you create a new Item Screen on the Item Screens page, you will assign these attributes individually.
While it may be useful to start off by creating Item Screens directly from your Library, you will likely want to add more Item Screens based on your business’s needs. For example, you will probably want a Favorites Item Screen that provides a quick and easy way to access your most popular items. It might also be useful to have separate Breakfast, Lunch and Dinner Item Screens that are only available at specific times of the business day. Furthermore, since Item Screens are an arbitrary way of organizing your Items, you can include a single Item in multiple Item Screens. So your Fudge Brownie may be in your Desserts Item Screen, but also in your Favorites Item Screen.
Name
The Name you give to the Item Screen. Make sure it is descriptive so that it is easy to differentiate between Item Screens. For example, you wouldn’t want to have Popular and Favorites Item Screens as that could get confusing for the Cashier.
Price
Setting a Price for a Item Screen sets the Price for all Items within that Item Screen, overriding the Price set for the Items when they were created on the Item Library Screen. This can be useful if you want to implement a Dollar Menu. To do this you would add the Items you want to offer for $1 to a Dollar Menu Item Screen and set the price of the Item Screen at $1.
You can also set the Price of individual Items within a Item Screen. This will override the Price set for the Items when they were created on the Item Library Screen as well.
Icon/Color
As was stated earlier, if you create Item Screens directly from your Item Library, the Item Screens and Items within those Item Screens will have the same Icon and Color as the Category, Subcategory, or Group that they were created from. However, when you create a new Item Screen and assign it an Icon and Color, the Items within it will keep the Icon and Color of its parent entity (the Category, Subcateogry, or Group it lives under in the Item Library), while the Item Screen itself will have the new Icon and Color.
Hours
When you create Item Screens from your Item Library, the hours will automatically be set as starting at 12:00 am and ending at 12:00 am, making them available whenever your business is open. You can edit this if you would like on the Edit Item Screens page.
When you create a new Item Screen, you are required to enter a start and end time for when the Items in the Item Screen are available. If you would like it to always be available, choose 12:00 am as the start and end time. But if you would like to limit the time that the Items can be ordered, then select the desired start and end time on the Add Item Screens page. This is especially useful if you have a breakfast menu that you stop offering at a certain time, or if you have a late-night menu that is a pared down version of your regular menu.
Items
When you add Item Screens from the Item Library Screen, the app goes through each Category, Subcategory, and Group and if there is a Item organized at that level, a Item Screen is created and the Items are automatically added to the Item Screen. When you create a new Item Screen, you select which Items you would like to include under that Item Screen. Items can be in one, many, or no Item Screens.
You can also sort the order in which Items appear within a Item Screen. This makes it easy to have the most commonly ordered Items readily available within each Item Screen.
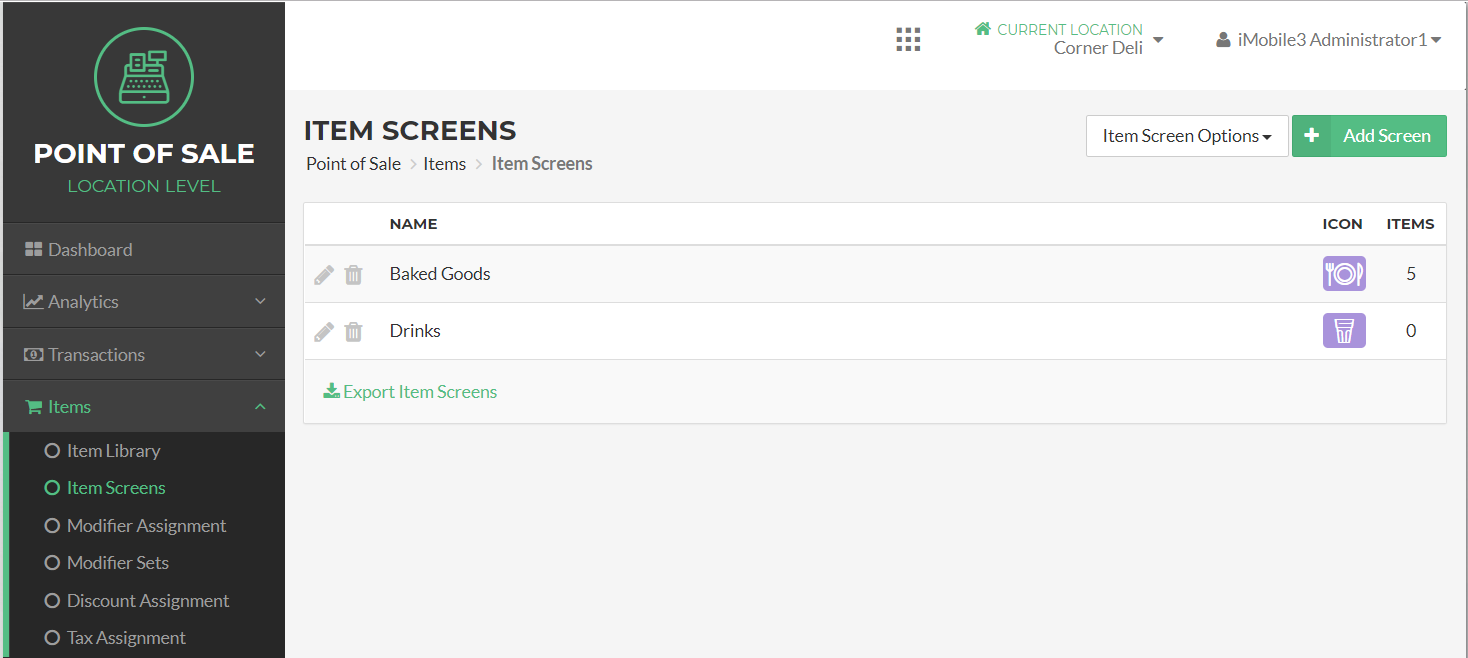
Item Screens: Screen Elements
You can find the Item Screens page in the Portal by selecting Items on the left side of the Navigation Menu, and then choose Item Screens from the listings.
Table
On the Item Screen page you will see a table with three columns: Name, Icon/Color, and Items. The Name Column has the name of the Item Screens you created. You can assign the name in the Create or Edit Item Screen Process, or if you add Item Screens from your Item Library, the names will be automatically assigned based on the Category, Subcategory, or Group Names you created.
The Icon Column shows the Icon and Color you assigned to each Item Screen. It is important to note that Items within a Item Screen do not change to the Item Screen color they are organized under, rather they keep the color assigned to them based on the Category, Subcategory, or Group they are in.
The Items Column lists the number of Items that are organized within each Item Screen.
Icons
To the left of the Name of each Item Screen there are two buttons, the Edit Button and the Delete Button. Clicking the Edit Button, represented by the Pencil Icon, takes you to the Edit Item Screen page where you can edit everything from the name of the Item Screen to which Items are organized within the Item Screen.
Clicking the Delete Button, represented by the Trash Can Icon, permanently deletes the Item Screen. This action cannot be undone.
Add Item Screens
In the top right corner of the screen you can see the Add Item Screen. Clicking this takes you to the Add Item Screen page. Once you have entered the necessary information and press the Save Button, you are taken to the Edit Item Screen page to finish the Add Item Screens Process. Click here to learn more about how to add new Item Screens.
Item Screen Options Button
Also in the top right corner of the screen is the Options Button. Clicking this brings a drop down into view that displays three options.
- Auto Create Screens from Categories - This allows you to autocratically generate Items Screens for your location based on the hierarchy of the Categories, Subcategories, Groups, and Items you've already created.
- Duplicate to Another Location - This allows you to clone existing Items Screens to another location for your business.
- Arrange Screens and Items - This allow you to Manually arrange the Item Screens and Items to you're liking.